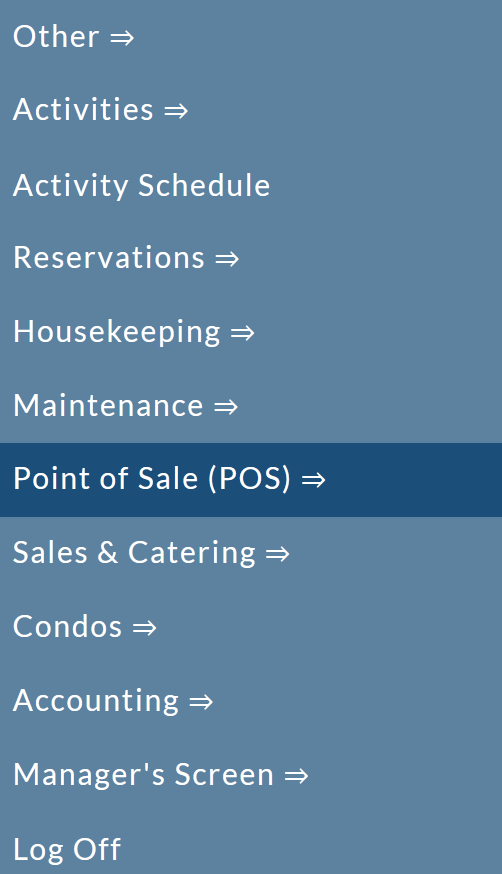
The Shopping List command is found on the Point Of Sale Menu. The POS Menu may be set as your default landing page. If it is not, you may open it by using the Quick Menu , or by selecting the command Point of Sale (POS) => from the Other section of the Full Menu.
OR:
This will display the POS Main Menu, which has four sections, Checks, Reports, Kitchens and Other; however the Other Category does not currently contain any commands.
The Shopping Lists command is in the Reports section.
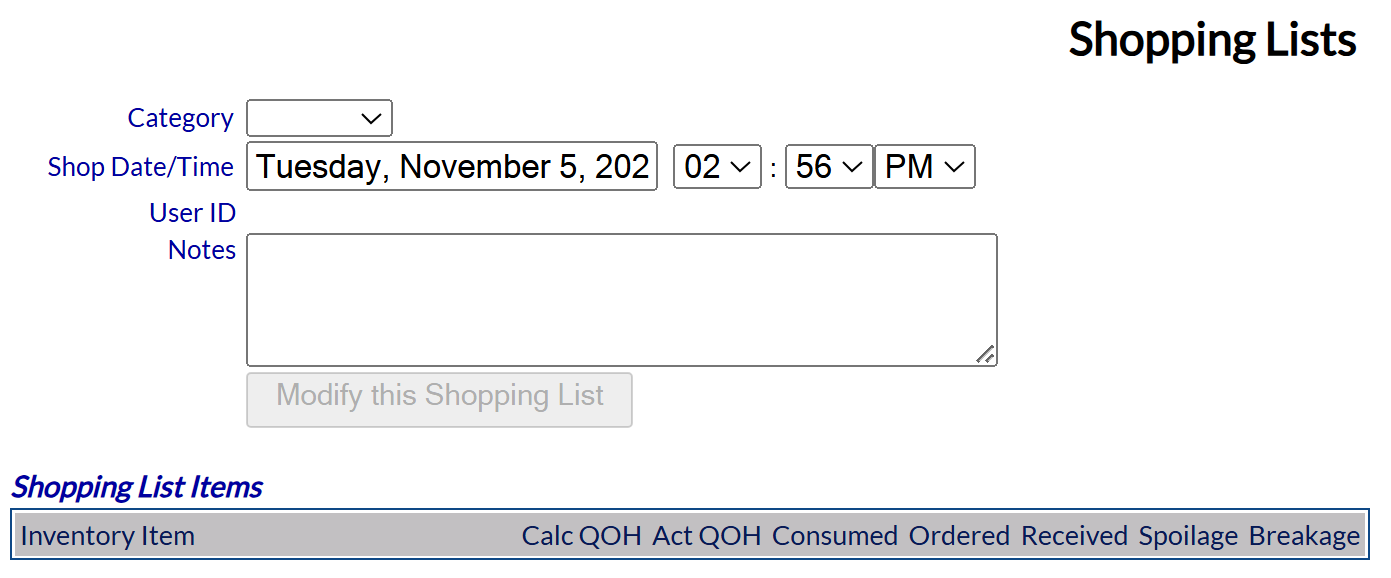
When selected the Shopping List screen will appear.
The screen display is split into two frames, with listings on the left-hand side and details of an individual listing on the right-hand side. Any changes made to a listing detail on the right, once saved, will be updated in the listings to the left.
Your options include the following:
Generate a new entry:
Click the New ![]() button from the toolbar to add a new Shopping List record. Complete the fields described below.
button from the toolbar to add a new Shopping List record. Complete the fields described below.
OR:
Select an existing Shopping List from the list on the left, and click the Replicate ![]() button from the toolbar. Then change the field information as described below.
button from the toolbar. Then change the field information as described below.
Modify the current selection:
Change the field information.
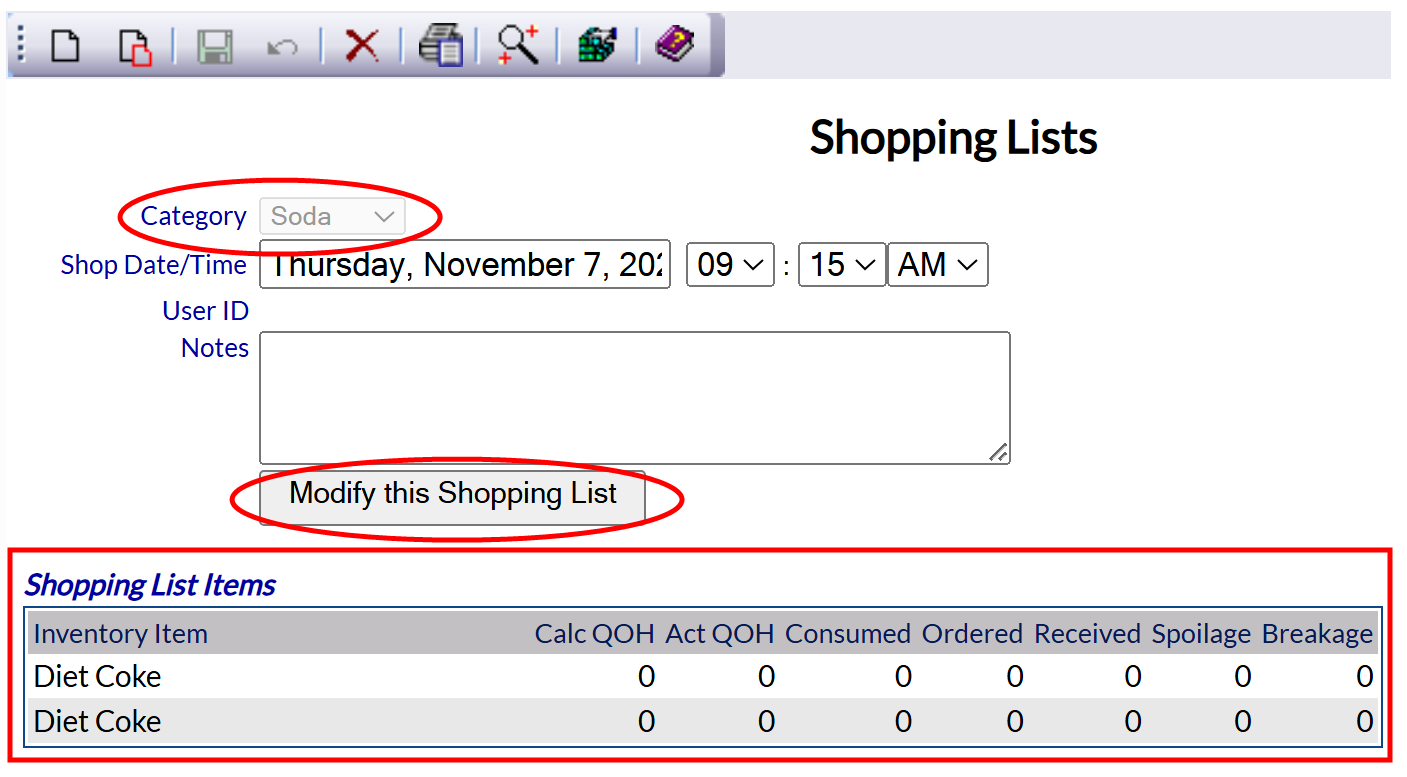
Note: If you choose to EDIT a displayed Shopping List, the "Category" field will be unavailable, as this is selected at time of Shopping List creation.
Category: A drop-down menu of Inventory Category choices. Select the appropriate option. By default, no category is selected, meaning ALL items designated for tracking purposes will be displayed once the Shopping List has been saved.
Note: Categories available in this screen need to be set up first using the Inventory Item Categories screen (in the Inventory Items section of the Configuration menu. See Inventory Category - POS for more details).
Shop Date/Time: The Date and Time may be chosen here. Select the Date and Time for the Shopping List.
Clicking on the Date field will open the calender where you may choose any Date. The Time field values are drop-down menus allowing you to select from
01-12 for Hour and 00-59 for minute, with AM or PM. By default, the values entered will reflect when the Shopping List was first generated.
User ID: The User ID for the person that generated the record will appear here, once the record has been saved to Skyware. Before the Shopping List has been saved and edited, this will appear blank.
Notes: Any notes regarding the record should be entered here.
Modify Shopping List: This button is grayed out and unavailable until the Shopping List has been saved.
At this point the Shopping List should be saved (using the save icon ![]() in the local tool bar).
in the local tool bar).
Once saved, the items assigned to the category will appear in the Shopping List Items section and the Modify Shopping List button will become active, allowing you to enter inventory for the listed items into the Shopping List Items section.
Note: BEFORE you have MODIFIED the Shopping List for the FIRST time, the numbers assigned to each section will display as 0. Once a Shopping List has been modified, the numbers in each column will then reflect the actual numbers saved and retrieved from Skyware.
Note: Inventory items are assigned for tracking, and to the relevant inventory category, using the POS Items Maintenance screen Inventory tab.
Only items that have been marked for tracking purposes will appear in the Shopping List Items section of the Shopping List screen.
Shopping List Items: This section lists in table form the Inventory Items assigned to the selected category, with several columns for details regarding the item:
Calc QOH: Calculated Quantity on Hand.
Act QOH: Actual Quantity on Hand.
Consumed: How many have been consumed or removed from inventory.
Ordered: How many have been ordered for purchase.
Received: How many of the ordered item were actually received.
Spoilage: How many of the item have spoiled or become unusable.
Breakage: How many of the item were destroyed.
Note: The list of inventory items shown in the Shopping List Items section CANNOT be modified using this screen. Inventory items can only be added or removed using the using the POS Items Maintenance screen Inventory tab.
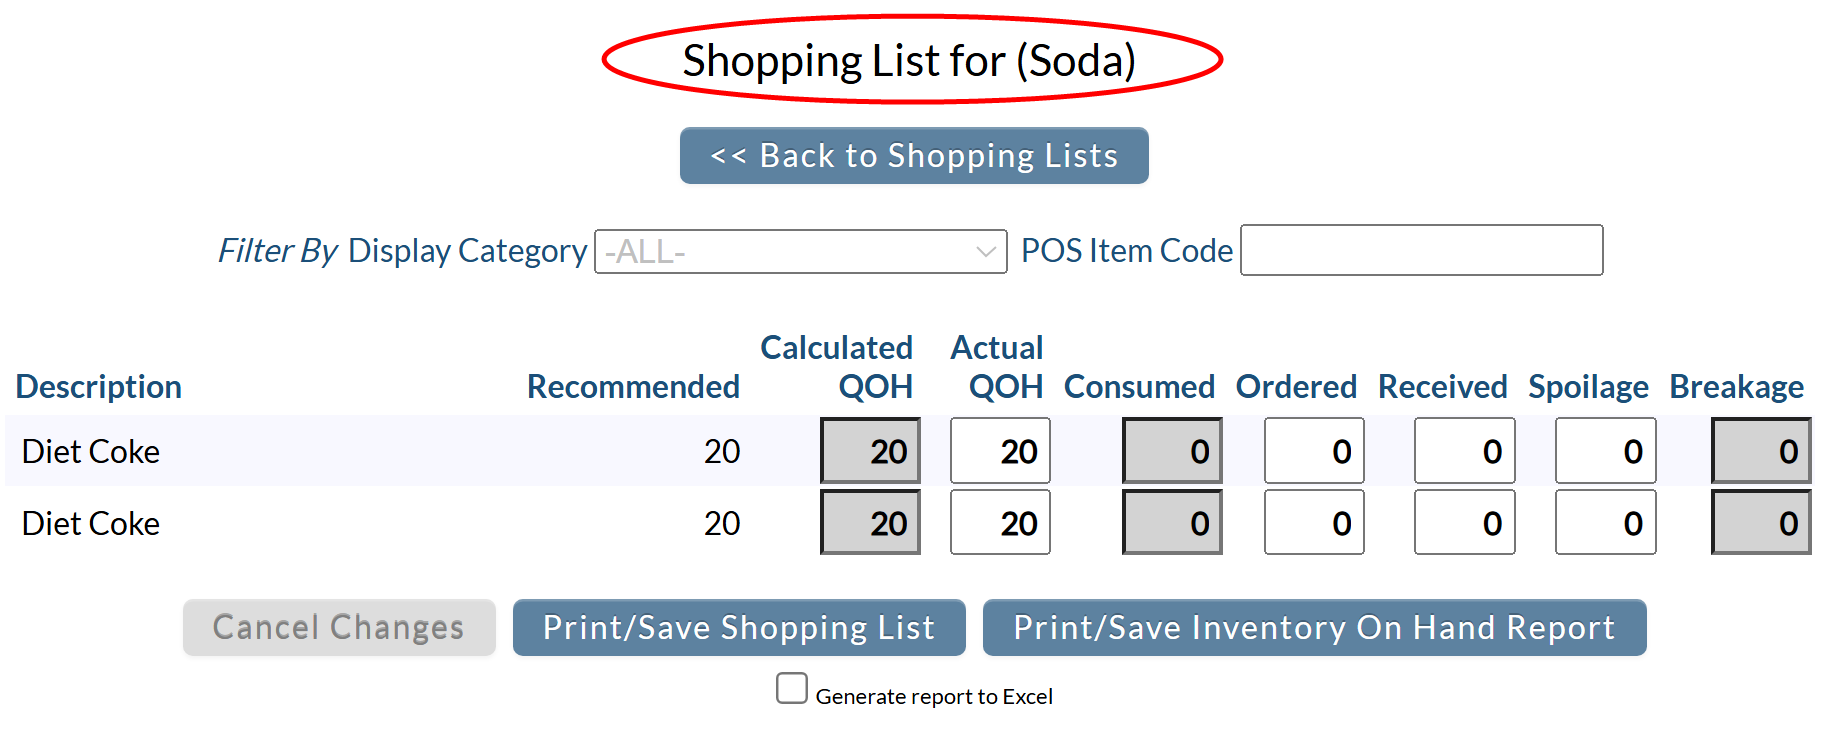
The shopping list displayed may be modified by clicking the button "Modify this Shopping List". This will open a new screen for the Shopping List, where the inventory items are listed and allows the quantities in (some of) the columns of the table to be altered.
This screen can be edited in several ways:
Filter by Display Category: This is a drop-down list of all available categories, as defined on the POS Item Display Categories screen. The default setting is "-ALL-".
POS Item Code: The list of items may be searched by specific POS Item code.
Description: The name of the Inventory item (as entered on the POS Items Maintenance screen, see Configure Menu or POS Items - General for more details).
Recommended: This number is taken from the POS Items Maintenance screen Inventory tab.
Calculated QOH: This is AUTOMATICALLY entered and shows how many items you SHOULD have on hand (using the other values shown) and cannot therefore be edited here.
Actual QOH: This can be edited with the actual quantity in stock.
Consumed: Is calculated automatically from the checks entered into the system.
Ordered: This quantity can be edited here when an item has been ordered.
Received: This quantity can be edited to reflect the delivery or purchase of items.
Spoilage: If items have spoiled this can be edited to reflect as such.
Breakage: This quantity is automatically calculated from the checks entered into the system.
The shopping list may be printed or saved as either a simple Shopping List, which lists the item name and the number entered in the "Ordered" field (to indicate how many have been ordered for purchase).
OR as an Inventory on Hand report (see Quantity on Hand), which contains more information.
By default, the report is generated in PDF form and opens in a separate browser window. From there you can select to save or print the report, among other options. If you prefer, you can select the Generate report to Excel check box to save a copy to the computer in Excel.
NOTE: The generated report appears as a pop-up window through your browser. If your browser is set to block pop-ups, you may receive a warning banner from the browser. Click this banner and select to allow pop-ups so that you can view the report.


